Creating User Accounts
When you create a user account, you give a trusted associate access to your ZOLL Online company and the ZOLL products you use.
Creating a User Account
- Click Company on the navigation bar.
- Click User Accounts.
Note: You must have the correct permissions to access User Accounts. For more information, see Billing Roles and Permissions.
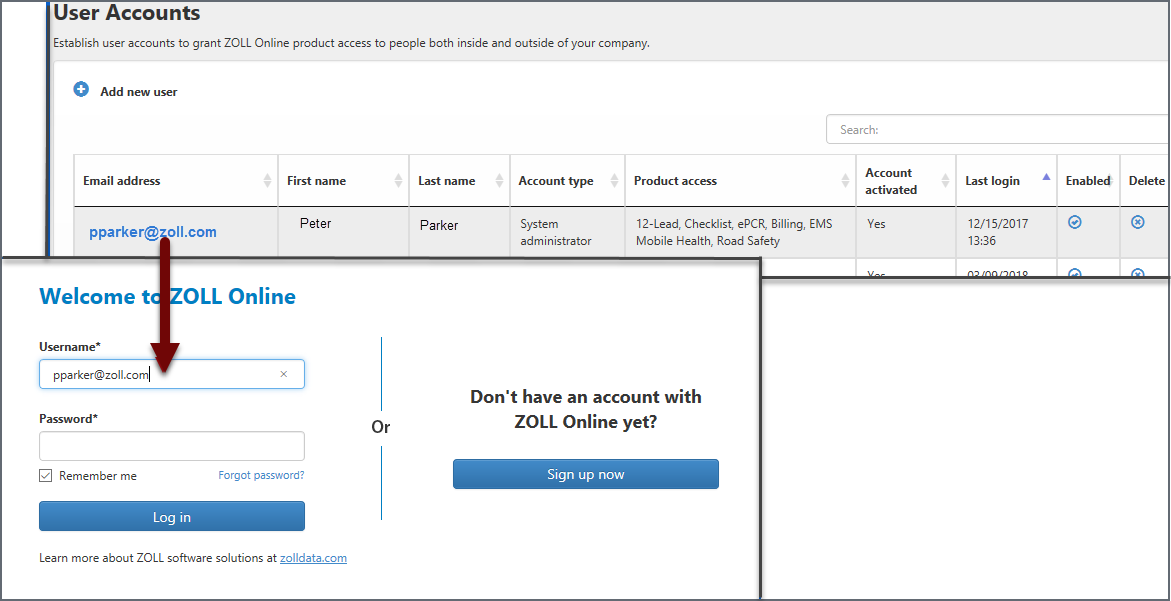
The User Accounts page displays. This first page lists user accounts that have already been configured.
- User’s email address, first and last name
- Type: The account type granted to this user - system administrator or standard user.
- User Groups: ZOLL provides Billing roles that can be found in User Groups. For a list of Billing Roles, see Billing Roles and Permissions.
-
Product access: The product(s) the user is allowed to access.
-
Account activated:
-
No: The user has never logged onto the system
-
Yes: The user has logged onto the system at least once
-
-
Last login: The last date and time the user logged onto the system. This field will be blank until the user logs in for the first time.
-
Enabled: The status of the account.
-
A check mark in this column indicates that the user account is enabled and can access your company.
-
A dash in this column indicates that the account is disabled. A user with a disabled account can log onto ZOLL Online but will not be able to access your company or the products you use. You can enable/disable a user account at any time.
-
- Delete: The user will still be able to log onto ZOLL Online but will not have access to your company or your company’s products. If the user is associated with companies besides yours, they will still be able to log onto ZOLL Online and access the products associated with those companies.
Even though you deleted the user from your company, the user still exists in the system so you can re-add them to your company at any time and they will be able to log back in with their old credentials.
Adding a user account
- Click Company on the navigation bar.
- Click User Accounts.
-
On the upper right corner, click "Add new user."
Personal information

First and last name: Enter the name of the user.
Email address: Enter a valid, unique email address for this user.
It is important that the email address be unique as it becomes the user's username and the address the system uses to send a welcome email.

Note: Help - I typed the wrong email address! We all make mistakes. If you typed the wrong email address and then saved the new user account, the system will not be able to send the welcome email to the user. To correct this issue, it is best to delete and then reenter the user.
Account type: There are two account types to choose from:
-
Standard user: Uses the system in some capacity such as a biller or payment poster. While a standard user's primary function is not that of an administrator, it is possible to give a standard user admin type functionality by enabling Billing permissions. For more information, see Billing Roles and Permissions.
-
System Administrator: A system administrator manages the system in some capacity. In addition, they can also be a user of the system. A System Administrator has access to all Billing permissions by default. For more information, see Billing Roles and Permissions.
User Groups: There are a number of Billing roles that display under User Groups. In addition, you can create your own groups. For more information on the Billing roles, see Billing Roles and Permissions.
How to find a user account when working in ZOLL Billing
When working within ZOLL Billing, you may need to find a Billing user account. Try one of the following:
- Enter the user’s email address in the Search field. The system starts searching after you enter the third character. The results display on the page.
- Click the arrows on each column to sort the list.